Summary of microbe sampling, sample preparation techniques and dilution, inoculation and culture methods!(1)
1.Sampling preparation
1.1. When sampling, the sample must be representative of the product.
Frozen samples retrieved from the workshop should be thawed as required, dry food can be placed in the cold and dark place at room temperature, perishable and cool samples should be placed in the environment of 10℃. Frozen samples too late for inspection should be placed in the refrigerator below -15℃, and the storage time of samples to be tested should not exceed 36h.
1.2. Thaw
In principle, after the frozen samples are taken out, they should be thawed naturally at room temperature according to the original packaging. It can also be thawed at 0-4℃ for no more than 18 hours; It can also be thawed at a temperature less than 45 ° C for less than 15 minutes. If these thawing conditions are not sufficient for some products, especially large frozen products, refer to the following thawing times.
(1) 100-300g prepared food thawed at 45℃ for about 10min;
② Frozen vegetables below 500g are thawed at 30℃ for about 40min;
③ Frozen samples above 500g were thawed at 37℃ for about 1h; Thaw at room temperature for about 2 hours.
※ Note: Thaw the sample to half thawed state (to the extent that scissors can cut).
1.3. Operating environment
Before the test, the ozone generator/ultraviolet light will be used to sterilize the instruments and sterile room to achieve sterile state.
Whether the preparation items for the operation test, such as homogeneous bags, alcohol and alcohol cotton,transfer pipette, dishes, diluents, scissors, tweezers, aseptic POTS, etc., are complete.
2.Sampling and preparation of sample liquid
2.1. Sample identification
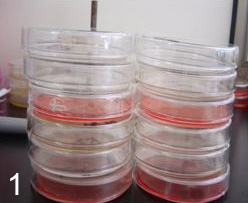
The samples were arranged in the order of low to high degree of contamination, and corresponding one-to-one identification was made. In the order of bacteria number plate, coliform group plate and Staphylococcus aureus plate, 2-3 samples were arranged in a pile. As shown in figure 1:
2.2. Test samples taken
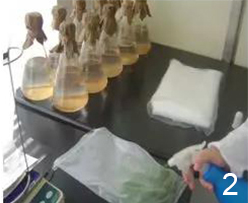
First, spray the front and back sides of the sample packaging with alcohol (if there is condensate water on the sample surface, wipe it clean and then spray with alcohol), as shown in Figure 2:
(1) Solid samples
75% alcohol cotton pad is used to disinfect the opening part and its surroundings, and then cut with flame sterilized scissors, as shown in Figure 3.
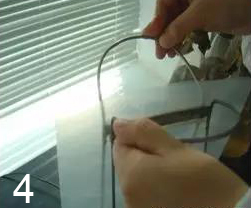
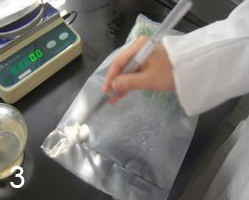 Put a sterile homogeneous bag on the electronic scale (do not touch the bag mouth with your hands), peel and adjust to zero, as shown in Figure 4.
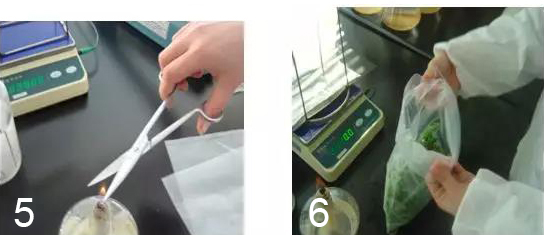
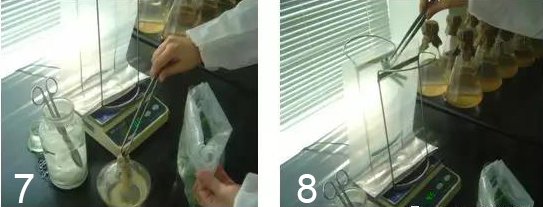
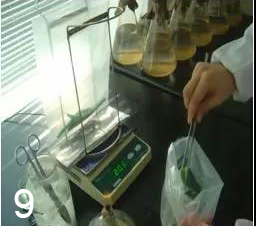
Take samples with flame sterilized scissors and tweezers, and weigh 25g representative samples, as shown in Figure 5, 6, 7, 8 and 9.
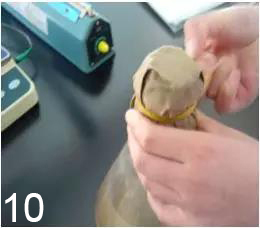
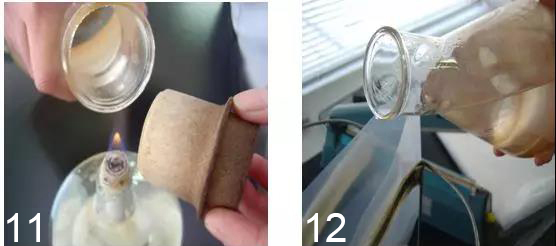
After adding 225ml sterilized phosphate buffer (when opening the cork, the bottle mouth and the cork should pass the flame 1-2 times to kill the mixed bacteria falling from the air), homogenize or wait for homogenization, as shown in Figure 10, 11 and 12.
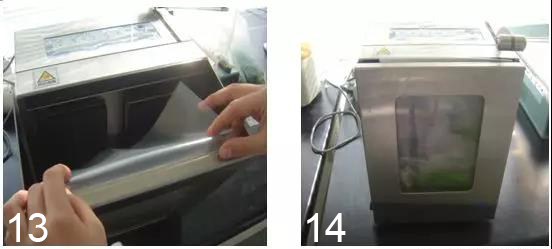
After folding the bag, use the slapping homogenizer to homogenize for about 30 seconds as the sample liquid. At this time, the homogenizing bag should be set as air free (the homogenizing time can be adjusted according to the different conditions of the sample), as shown in Figure 13 and 14.
(2) Liquid sample
① The frozen sample should be used after thawing completely.
② 75% alcohol cotton disinfects the opening part and its surroundings, then opens it with flame sterilized scissors, and takes 25ml of fully mixed sample with sterilized straw.
③ The rest of the steps are as described above.
(3) Powder samples and semi-solid samples
① Homogenize the sample mixture.
② 75% alcohol cotton is used to disinfect the opening part and its surroundings, and then flame sterilized scissors are used to open it, and 10g of mixed sample is taken with a sterile spoon.
③ Add 90ml sterilized phosphate buffer, and when opening the bottle stopper, the bottle mouth and the bottle stopper should pass through the flame 1-2 times to kill the mixed bacteria falling from the air.
④ The rest of the steps are as described above.
Does note:
A. To take samples from cans, place a small alcohol sponge on the surface (pour a small amount of alcohol over it) and ignite it before opening the cans. Can opener is wiped with alcohol cotton and used after flame sterilization.
B. 75% alcohol must be changed 3 times a week, immediately if there is obvious dirt in the container.
C. Flame sterilized scissors and tweezers can be carried through the flame for 4-5s.
3.Dilution method
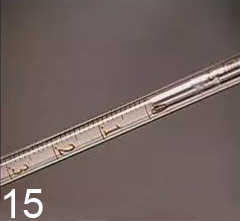
3.1Accurately absorb 1ml sample solution from the homogeneous bag, as shown in Figure 15.
3.2. Slowly inoculate into 9ml phosphate buffer solution along the tube wall, cover the test tube plug, fully shake and mix to 1:100 diluent. (Do not make the pipette tip into the diluent, so as to avoid the external adhesion of the pipette solution dissolved in it.)
3.3. Repeat the operation and prepare 1:1000, 1:10000… The diluent.
3.4. In order to reduce sample dilution error, during continuous increasing dilution (stock solution before diluent after diluent), each diluent should be fully shaken to make it even, at the same time, each dilution should be replaced with a straw
3.5. Do not blow the straw in the thinner.
Does note:
A. The dilution of the sample solution must be shaken enough to ensure that the liquid is well mixed and the colonies formed can increase or decrease by a factor of 10, which is logical.
B. Suitable dilution times should be selected for workshop products according to processing technology or estimation of pollution. (Pay special attention to non-heated products such as onion, ginger, garlic, preservation experiment, transfer to new manufacturers, sample development, raw materials and other samples).
Post time:2024-08-01

